Edited: to add PDF download link.
Short Row Bust Dart Tutorial: Top Down:
The top down method of construction is the easiest to figure out short row placement. Now since you are knitting top down, you will have been trying the garment on as you go. After separating the sleeves off, check to ensure the exact spot of the fullest part of your bust. All of us have a different height of bust. This height should not change often but will change as you age and as your bras lose their elasticity.
- Make sure that you have 2 markers on the garment, one at each side seam.
- Knit to the apex of your bust, which tends to be 2 inches from the underarm join.
- Try on the garment so that you can place 2 more stitch markers (preferably locking stitch markers). Mark the apex of each bust wearing the bra you will most often wear with the garment.
- Take off the garment and check that the bust markers are equally spaced from the side seams. A=_____ stitches
- Now measure your torso length from shoulder to waist on your back and front.
- Subtract your back length from the front length. This number will be the depth of your short rows B=_____ inches
- Multiple your depth difference by the number of rows per inch in your gauge. C=_____ rows
- Divide by 2 to find out the number of short row sets. D=______ sets
- Now take A and divide it by D + 1. E=_______ stitches between short rows turning points

I have learned that starting out with the smallest number of stitches between the Wrap & Turn (W&T) and proceeding to the largest number of stitches between the W&T, causes you to have a seamless pick up of the wraps. So you would pick up the wraps as you knit or purl past them to the next W&T point. Make sure when picking up the wraps that you put them in order with the stitch in front of the wrap before you knit or purl them together.

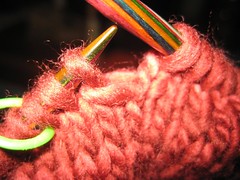
 To the left is a wrapped stitch before I start picking it up and knitting together with its wrap.
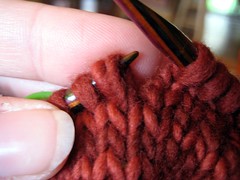
To the right is the wrapped stitch picked up and placed in the right order, the wrap behind the knit stitch.

 To the left: The second stitch from the left is a picked up and knit wrapped stitch. You can just barely.
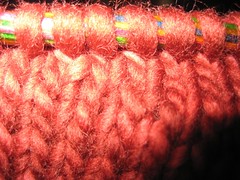
To the right: This is how your short rows will look, after you have done all of them a wedge will have formed.
Example:
I have a gauge of 18.5 st by 28 rows = 4” square.
A= 24 stitches (between side and bust on each side)
B=2” (this was the measurement when you subtract the back from the front length)
C= 14 rows (2 x 7 stitches per inch)
D= 7 sets (14/ 2 equals the set numbers)
E= 3 stitches (24/ 7+1 equals the number of stitches between each wrap)
So you would knit past the second bust point marker to E (ie 3 sts), W&T on the next stitch. Purl across to E stitches past the first and second bust point marker. (you never do a W&T between the bust point markers), W&T. Knit to wrap, pick up the wrap, knit E-1 so that you are E times n (n being the short row number) (ie 6sts), W&T. Purl to wrap, pick up the wrap, purl E-1 so that you are E times n (n being the short row number) (ie 6sts), W& T. Knit to wrap, pick up the wrap, knit E-1 so that you are E times n (n being short row number) (ie 9sts), W&T. Purl to wrap, pick up wrap, purl E-1 so that you are E times n (n being short row number) (ie 9sts), W&T. Continue repeating the last two rows until you have reached E times D (21 stitches from the bust point marker). End with a purl side. Knit around picking up each wrap as you reach it. That would be a total of two wraps upon your return to knitting in the round.
Short Row Bust Dart Tutorial (PDF link)
If you are curious about why you should use short row bust darts and if you might need other kinds of bust darts, there is another tutorial about the need for bust darts plus more information and how to links on short rows.
Let me know how this works for you or if any of the math does not make sense.


|